How to install Excel’s Power Query and Power Pivot add-ins
Important notes:
Power Query and Power Pivot are available only on Microsoft Office suites meant for businesses (i.e. Professional/ Enterprise) or certain standalone Excel versions.
MS Suites and OS that do not support these add-ins: Mac, Microsoft Office Home/Home & Student.
To not miss out on the fun, Mac users are encouraged to install Boot Camp or Virtual Machine to gain access to a Windows platform on your Mac.
How to install Power Query
This depends on which version of Excel you have. If it is Excel 2016, you do not need to do anything. Power Query has already been integrated into the main workbook platform. It sits under the “Data” Tab and is covered under “Get & Transform Data” and “Queries & Connections” sections.
If you have a different version of Excel, head over to Microsoft's website to check if your version supports the Power Query plug-in and download the installation file.
(Unsure if your Excel version is running on 32-bit or 64-bit? Click on the video below for instructions.)
Once the installation file is downloaded, open up the file and follow the steps in the Setup Wizard window. When you have been prompted that installation is complete, open Excel and you show see a Power Query tab on your toolbar.
If for any reason, your Power Query tab vanishes after the installation, just follow the same steps below to get it back.
Note: Both Power Query and Power Pivot sit under COM Add-ins in Excel, so those are the same steps you want to follow.
How to install Power Pivot
If you are using Excel 2013 and 2016, simply follow the steps below:
Step 1: Go to File > Options
Go to your File tab and select Options

Step 2: Select Add-ins > Manage > COM Add-ins > Go...
Once the window opens, select the Add-ins option on the left-hand side column. Go to the bottom of the loaded page and click on the Manage drop-down list. Choose COM Add-ins from the list and hit on the “Go…” button right next to it.

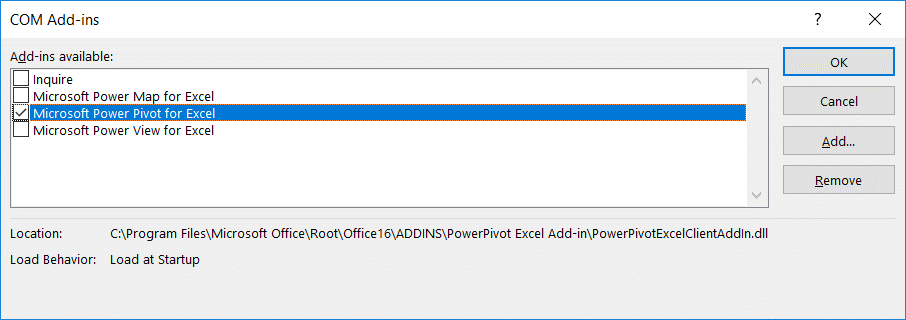
Step 3: Select Microsoft Power Pivot for Excel and press OK
A separate window should pop-up after you hit the “Go…” button. Select “Microsoft Power Pivot for Excel” and press the “OK” button.
Now, you should see an additional tab appear on your Excel window with the words “Power Pivot”.

If you are using a different version of Excel, head over to Microsoft website to check if your version supports the Power Pivot plug-in and download the installation file.
Once the installation file is downloaded, follow the steps above to get access to the Power Pivot plug-in. Alternatively, you can view the video below for more visual instructions.
